
The art of the blistered crust finds its roots in the ancient traditions of Neapolitan baking, where high-heat ovens and simple ingredients create a symphony of textures. In the heart of Italy, the focus was never on complexity, but on the purity of a few staples: flour, water, salt, and yeast. The goal was always a crust that could withstand the intense heat of a wood-fired oven while remaining light and airy inside.
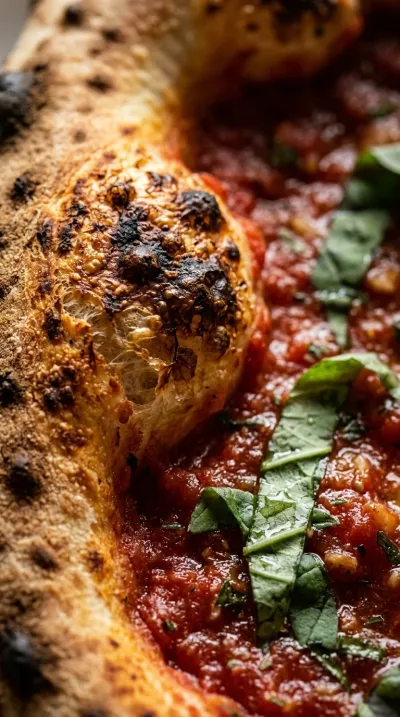
Over time, the concept of "artisan" dough evolved to emphasize long fermentation. By allowing the dough to rest and develop, the sugars in the flour break down, creating those characteristic charred bubbles known as "leopard spotting." This slow process is what gives the crispy chewy bubbly artisan pizza dough its deep, complex flavor profile that quick-rise breads simply cannot replicate.
Today, the pursuit of the perfect crust has moved from the streets of Naples into home kitchens across the world. Using a pizza stone or steel allows home bakers to mimic that professional sear, bridging the gap between a rustic village oven and a modern kitchen. It is a celebration of patience and the timeless chemistry of fermentation.
Why You'll Love It
-
- Honestly, that first bite is just magic, with a crust that's wonderfully blistered and golden on the outside but still soft and pillowy in the middle.
-
- I remember when I first learned to let the dough rest; it just creates these gorgeous, airy bubbles that make the pizza feel like it came from a fancy bakery.
-
- Well, look, it's the kind of recipe that slows you down in the best way, filling your kitchen with that warm, yeasty smell that just feels like home.
-
- It's so satisfying to see the edges get that perfect, shatter-crisp crunch while the center stays chewy and comforting.
"I mean, I've tried a dozen recipes, but this one is just different. The bubbles are incredible and the chew is exactly right."
Essential Ingredient Guide
- 500g bread flour (about 4 cups): This is the backbone of our crust. I always use bread flour because it has that extra strength to give us those lovely, chewy bubbles we're after.
- 350g warm water (90°F / 32°C): The temperature is key here, really. If it's too hot, you'll kill the yeast, so just a gentle warmth to wake everything up.
- 5g sugar (optional): Now, you don't strictly need this, but a pinch helps the crust brown a bit more beautifully in the oven. It's just a little something for color.
- 10g salt (1 tsp): Don't be shy with the salt; it's what brings out all the depth of the flour. It keeps the flavor from being bland, which, ugh, nobody wants.
- 5g instant dry yeast (1 ½ tsp): This little bit of magic is what makes the dough rise. Just whisk it right in with the flour and let it do its thing.
- olive oil: I love a little drizzle of high-smoke-point olive oil right at the end. It adds a silky richness that just ties the whole thing together.

Complete Cooking Process
-
Ingredient Readiness:
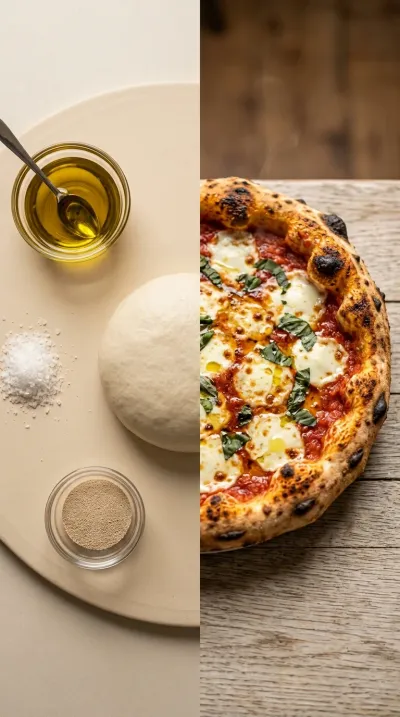
Everything starts with getting that 350g warm water just right at 90°F. I like to whisk my 500g bread flour, 10g salt, 5g instant dry yeast, and 5g sugar together first so there are no clumps.
-
Flavor Development:
The real magic happens during those 2 hours of bulk fermentation. Those stretch-and-folds every 30 minutes really build the structure and let the flavors deepen and mature.
-
Texture Control:
Allowing the dough to autolyse for 10 minutes and then resting the shaped balls for 20 minutes is so important. It relaxes the gluten so the dough stretches easily without snapping back.
-
Finishing Touches:
Once it's out of the oven, I like to add a dash of flaky sea salt. It gives a little sparkle of flavor against the golden, blistered crust.
-
Serving Timing:
You'll want to serve this immediately while the cheese is bubbly and the edges are still crisp. It's just so much better when it's piping hot.
-
Use 90°F water to maintain the dough’s hydration and prevent it from drying out during the long fermentation.
-
Rotate the pizza halfway through baking to avoid hot spots and to ensure a uniformly crisp crust.
-
Finish the pizza with a light drizzle of high-smoke-point olive oil and a dash of flaky sea salt just before serving.
-
Ensure your pizza stone or steel heats for at least 45 minutes at 475°F before the dough hits it.
Pro Tips
Just take your time with it, and you'll be amazed at what you can create.


Better For You Treats
I love that this dough is naturally vegan since it has no dairy or eggs. For my friends who watch their salt, you can easily swap some of the 10g salt for a pinch of rosemary to keep things fragrant and mindful.
Ways to Make it Your Own
If you're feeling adventurous, try adding 2 tablespoons of fresh rosemary or thyme to the flour. Or, if you have some sourdough starter, you can replace 150g of the flour to get an even deeper, tangier chew.
Serving Suggestions
I think a fresh arugula salad with a lemon vinaigrette cuts through the richness perfectly. Oh, and a drizzle of basil-infused olive oil right before serving makes the whole house smell like a dream.
Frequently Asked Questions
→ What if my dough is too sticky to handle?
Don't panic! Just use a little bit more flour on your hands and surface, or give it another set of stretch-and-folds to build that strength.
→ Can I make this dough ahead of time?
Yeah, absolutely. You can keep an unbaked ball in a sealed container for 12 hours, or even freeze them for up to 3 months if you're planning ahead.
→ My oven doesn't have a pizza stone, what do I do?
No worries at all, just use a flat baking sheet. It won't be quite as bubbly, but it'll still be delicious.
Nutrition Facts
per serving
620
Calories
32g
Protein
112g
Carbs
3g
Fat
Taste Profile
A balanced, savory crust with a deep, fermented wheat flavor.
Ingredient Substitutions
Don't have an ingredient? Try these alternatives
The crust will be softer and less chewy since there is less protein.
You'll need to bloom it in the warm water first for 5-10 minutes.
Recipe Variations
Try these delicious twists on the original
Sourdough-Infused Artisan Pizza Dough
For a richer flavor and a bit more chew, replace 30% of the flour (150g) with a fresh, 10% hydration sourdough starter and reduce the yeast to 2g. Let it ferment overnight in the fridge.
Herb-Infused Artisan Pizza Dough
Make the crust aromatic by adding 2 tablespoons of finely chopped fresh rosemary or thyme directly into the dry flour mix before you add the water.
Common Mistakes to Avoid
Learn from others' mistakes for perfect results
- Using water that is too hot, which can kill the yeast.
- Skipping the 45-minute preheat for the pizza stone.
- Over-working the dough after the bulk fermentation, which makes it hard to stretch.
Meal Prep & Storage
Make Ahead Tips
You can prep the dough balls and keep them in the fridge or freeze them for up to 3 months for later use.
Leftover Ideas
Keep cooked crusts in an airtight box for up to 3 days; reheat in the oven to bring back the crispiness.
Perfect Pairings
Serve this with...
Cooking Timeline
Mixing and forming the shaggy dough
Autolyse rest and kneading
Bulk fermentation with stretch-and-folds
Dividing and resting dough balls
Stretching, topping, and baking


Crispy Chewy Bubbly Artisan Pizza Dough
There is something so grounding about the smell of yeast and warm water filling the kitchen. This crispy chewy bubbly artisan pizza dough creates a beautiful, blistered crust that feels like a warm hug for your taste buds.
Timing
Prep Time
30 Minutes
Cook Time
12 Minutes
Total Time
180 Minutes
Recipe Details
Ingredients
Main Ingredients
-
01
500g bread flour (about 4 cups)
-
02
350g warm water (90°F / 32°C)
-
03
10g salt (1 tsp)
-
04
5g instant dry yeast (1 ½ tsp)
-
05
5g sugar (optional)
Instructions
Start by grabbing a large mixing bowl. Whisk together your 500g bread flour, 10g salt, 5g instant dry yeast, and that 5g sugar if you're using it. Just stir them until everything is well blended and looks even.
Now, carefully heat your 350g warm water to exactly 90°F (32°C). Gently pour it into your dry ingredients. I usually use a wooden spoon or a dough hook here; just stir it until a shaggy, messy-looking dough forms. It's okay if it looks a bit rough at first.
Well, look, the dough needs a little nap. Let it rest for 10 minutes to autolyse. After that, knead it by hand or use your stand mixer on low speed for about 3 minutes. You're looking for it to feel smooth and elastic under your palms.
Transfer the dough into a lightly greased bowl and cover it with a damp cloth or plastic wrap. Let it bulk ferment at room temperature for 2 hours. While it sits, perform 3 sets of stretch-and-folds, spacing them about 30 minutes apart. It's a slow process, but honestly, it's worth it for those bubbles.
Once the fermentation is done, tip the dough onto a lightly floured surface. Divide it into 3 equal portions and shape each one into a tight, smooth ball. Place them on a tray, cover them lightly, and let them relax for 20 minutes so the gluten doesn't fight you.
While the dough is resting, preheat your oven to 475°F (245°C) with your pizza stone or steel already inside. You've got to let that stone heat up for at least 45 minutes; patience is key here.
Place one dough ball on a well-floured pizza peel or parchment. Gently stretch it out into a 12-inch circle. I like to leave the edges a bit thicker for a nice, puffy crust.
Time for the fun part. Add your favorite toppings—start with sauce, then cheese, then your meats, veggies, or herbs. With a quick hand throw, slide the pizza onto that scorching hot stone.
Bake for 12–14 minutes. You're looking for bright golden blistered bubbles and edges that are visibly crispy. Oh, and remember to rotate the pizza halfway through so it browns evenly.
Notes & Tips
-
1
The 90°F water is a must to keep the hydration right during the long wait.
-
2
Don't skip the stretch-and-folds; they're what give the crust its artisan structure.
-
3
Rotating the pizza prevents those annoying hot spots in the oven.

Tools You'll Need
-
Large mixing bowl for blending
-
Dough scraper for easy handling
-
Kitchen scale for precise measurements
-
Stand mixer with dough hook or strong hands for kneading
-
Clean kitchen towel or plastic wrap for covering
-
Proofing bowl or container
-
Pizza stone or steel for high heat
-
Oven
-
Pizza peel or flat baking sheet for sliding
-
Timer to keep track of the fermentation
Must-Know Tips
-
Water Temp, Use 90°F water to maintain hydration and prevent drying during fermentation.
-
Even Baking, Rotate the pizza halfway through to ensure a uniformly crisp crust.
-
Final Touch, Add a drizzle of high-smoke-point olive oil and flaky sea salt just before serving.
Professional Secrets
-
The autolyse period (Step 3) allows the flour to fully hydrate, making the dough easier to work with.
-
Stretch-and-folds build strength in high-hydration doughs without over-kneading.
-
Preheating the stone for a full 45 minutes mimics a professional deck oven for that instant 'oven spring'.
What readers are saying
Community reviews from home cooks like you
I wanted to love this dish, but it didn't quite work for me. I swapped one ingredient and it still worked. I think with some tweaks it could be really good.
I was surprised how good this turned out. I really liked how the 500g bread flour (about 4 cups) and 350g warm water (90°F / 32°C) came together. It took slightly longer than the recipe said. Already shared it with a friend.
Perfect for a busy weeknight. I really liked how the 500g bread flour (about 4 cups) and 350g warm water (90°F / 32°C) came together. I added a bit more seasoning next time. Thanks for sharing this one!
Perfect for a busy weeknight. I really liked how the 500g bread flour (about 4 cups) and 350g warm water (90°F / 32°C) came together. My oven needed an extra 5 minutes. Highly recommend giving it a try.
Absolutely loved this recipe! I really liked how the 500g bread flour (about 4 cups) and 350g warm water (90°F / 32°C) came together. Highly recommend giving it a try.
Will definitely make this again. I really liked how the 500g bread flour (about 4 cups) and 350g warm water (90°F / 32°C) came together. Saving this for later.
I wanted to love this dish, but it didn't quite work for me. The texture was a touch off, but the flavor saved it. I think with some tweaks it could be really good.
This exceeded my expectations. I really liked how the 500g bread flour (about 4 cups) and 350g warm water (90°F / 32°C) came together. Will be making this regularly.
Absolutely loved this recipe! I really liked how the 500g bread flour (about 4 cups) and 350g warm water (90°F / 32°C) came together. It took slightly longer than the recipe said. Will be making this regularly.
I was surprised how good this turned out. I really liked how the 500g bread flour (about 4 cups) and 350g warm water (90°F / 32°C) came together. My oven needed an extra 5 minutes. Already shared it with a friend.
This exceeded my expectations. I really liked how the 500g bread flour (about 4 cups) and 350g warm water (90°F / 32°C) came together. Perfect as written.
Perfect for a busy weeknight. I really liked how the 500g bread flour (about 4 cups) and 350g warm water (90°F / 32°C) came together. My kids even asked for seconds.
Good, but not amazing. The cups) flavor was nice, but i found it a bit sweet for my taste. I might try it again with some adjustments.
Can't believe how simple this was. I really liked how the 500g bread flour (about 4 cups) and 350g warm water (90°F / 32°C) came together. My oven needed an extra 5 minutes. My kids even asked for seconds.

Recipe by
Sofia RiveraExploring the world through food 🌍🍲 Rich flavors, exciting dishes, and endless culinary inspiration ✨
Get Delicious Recipes Weekly
Join 25,000+ home cooks getting our best recipes straight to their inbox.
Free forever • No spam • Unsubscribe anytime