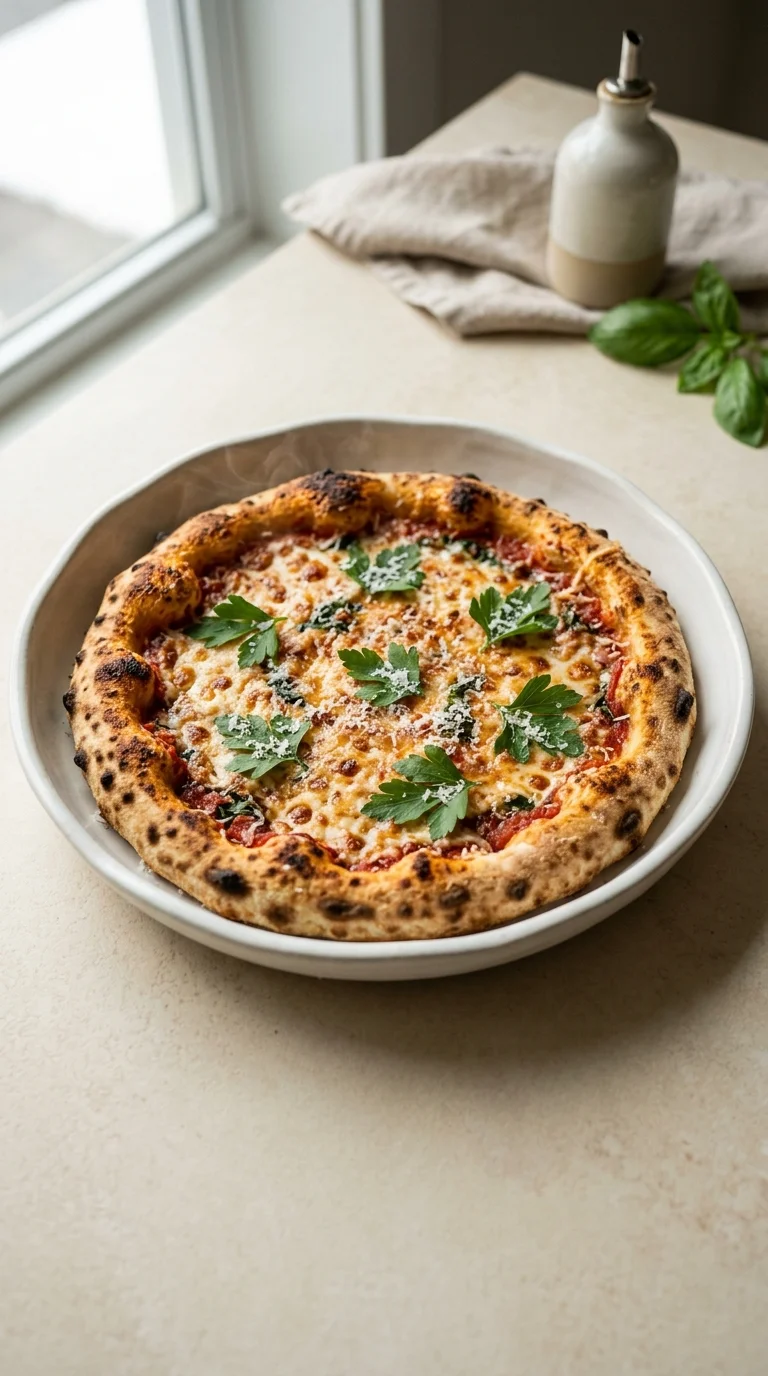
The art of the sourdough crust is rooted in an ancient tradition of wild fermentation, a practice that dates back thousands of years to the earliest civilizations in the Fertile Crescent. Long before commercial yeast existed, bakers relied on the symbiotic relationship between wild yeast and lactic acid bacteria found in the air and flour to lift their bread. This slow process didn't just provide rise; it transformed the flavor profile of the grain, introducing a subtle tang and a more complex aromatic quality.
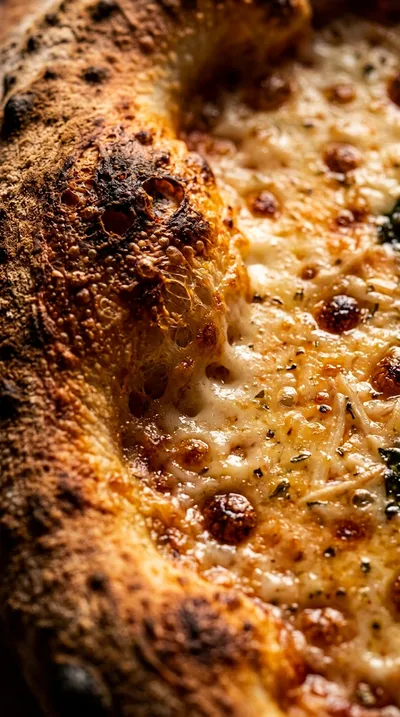
In the heart of Naples, the birthplace of modern pizza, the focus has always been on the marriage of high-heat ovens and carefully hydrated dough. While the traditional Neapolitan style is soft and pillowy, the evolution of crispy sourdough pizza dough blends that ancestral fermentation with techniques designed to create a sturdier, more golden crumb. This balance of acidity from the sourdough and the caramelization from the heat creates a chemical reaction known as the Maillard reaction, resulting in those iconic charred bubbles.
Over time, this method has transitioned from village ovens to home kitchens, bringing a touch of European heritage to the dining table. The use of long fermentation periods helps break down the proteins in the flour, making the crust not only more flavorful but also gentler on the stomach. It is a culinary bridge between the raw simplicity of ancient grains and the refined cravings of the modern palate.
Why You'll Love It
-
- Honestly, that first bite of a bubbly, golden crust is just magic. It has this lovely, airy chew that makes every slice feel like a little treat.
-
- I love how the 80g active sourdough starter adds a gentle tang. It reminds me of the old-fashioned breads my grandmother used to keep on her counter.
-
- It is just so versatile, yeah? Whether you have all day for the sourdough or need the 12g active dry yeast for a quick feast, it always comes out crispy.
-
- There is something so grounding about kneading the dough by hand. It's a quiet moment in a busy day, and the smell of baking bread just fills the whole house with warmth.
"I mean, wow. I've tried a dozen recipes, but this is the only one that actually gives me that bakery-style crunch!"
Essential Ingredient Guide
- 400g bread flour (≈3 cups): I always suggest a high-protein flour here for that perfect chew. It gives the dough the strength it needs to hold those beautiful air bubbles.
- 80g active sourdough starter (100% hydration): Make sure your starter is nice and bubbly before you stir it in. It's the heart of the flavor, giving us that soft, reflective tang we all love.
- 12g active dry yeast (≈2 tsp) *optional*: Well, if you're in a rush, this is your best friend. It skips the long wait but still gives you a wonderful, golden crust.
- 10g salt (≈1 ½ tsp): Don't skip this, honestly. It balances the flavors and helps the crust get that lovely, professional-looking brown color in the oven.
- 15g olive oil (≈1 tbsp): Just a little bit of oil makes the dough feel supple under your hands. It also helps the crust get that signature crispiness we're after.
- 5g sugar (≈1 tsp): Just a pinch, really. It helps the yeast along and gives the crust a hint of sweetness that pairs so well with salty cheese.

Complete Cooking Process
-
Getting Ready:
Start by whisking your dry ingredients together. I like to make sure everything is well-combined before adding the liquids to avoid any little clumps of flour.
-
Deepening the Flavor:
The magic happens during the bulk fermentation. Whether it's the 4-4.5 hours for sourdough or a cold sleep in the fridge for the yeast version, this is where the taste really develops.
-
Perfecting the Texture:
Kneading for 5-7 minutes is key for that elastic feel. Then, letting the shaped balls proof for about an hour ensures the crust stays light and doesn't fight you when you stretch it.
-
The Final Touch:
Preheat your stone to 500°F and slide your pizza in carefully. I always look for those bubbly, golden-brown edges before deciding it's ready to come out.
-
The Perfect Moment:
Let your pizza rest for just 2 minutes on the board. It's hard to wait, I know, but it lets the cheese set so it doesn't slide off when you slice it.
-
Use bread flour with 12-13% protein for the best chew and extensibility.
-
If using yeast, try a 12-24 hour cold rest in the fridge for a much deeper flavor.
-
Keep a small bowl of water in the oven to create steam for a crispier crust.
-
Stretch your dough to 10-12 cm and leave a slightly thicker rim for a beautiful crust.
Pro Tips
Just take your time with it, and your kitchen will smell like a dream.


Better For You Treats
I find the sourdough fermentation makes this dough so much easier on the tummy. Since the starter pre-breaks the proteins, it's a gentler way to enjoy a hearty, comforting meal.
Ways to Make it Your Own
You can stir in a tablespoon of fresh rosemary and coarse sea salt for an earthy vibe, or just stick to the classic. Honestly, I love adding a bit of garlic powder to the 400g bread flour for a savory kick.
Serving Suggestions
I love finishing mine with a drizzle of extra-virgin olive oil and some fresh basil leaves. A crisp arugula salad with lemon vinaigrette on the side really balances the warmth of the cheesy crust.
Frequently Asked Questions
→ What if my dough is too sticky to knead?
Oops, that happens! Just sprinkle a little extra flour on your surface and hands, but be careful not to add too much or the crust will get tough.
→ Can I freeze the dough for later?
Yes, absolutely. Just wrap your portions tightly in plastic and they'll stay good in the freezer for up to 3 months.
→ My oven doesn't go to 500°F, what do I do?
Well, just set it to its highest setting. It might take a few extra minutes to brown, but it'll still taste wonderful.
Nutrition Facts
per serving
280
Calories
12g
Protein
42g
Carbs
6g
Fat
Taste Profile
A balanced, slightly tangy sourdough base with a salty, savory finish.
Ingredient Substitutions
Don't have an ingredient? Try these alternatives
The crust will be softer and less chewy.
A neutral-tasting oil that works just as well.
Use as directed in the quick yeast variation.
Recipe Variations
Try these delicious twists on the original
Rosemary & Sea Salt Sourdough Pizza
Infuse the dough with a tablespoon of fresh rosemary and a tablespoon of coarse sea salt before bulk fermentation. It creates an earthy, aromatic crust that's just lovely with goat cheese and caramelized onions.
Quick Yeast “Fire–Pizza”
Skip the sourdough starter and use 2 teaspoons of active dry yeast instead. This is my go-to for last-minute gatherings when you want that bubbly crust without the long wait.
Common Mistakes to Avoid
Learn from others' mistakes for perfect results
- Under-preheating the stone, which leads to a soggy bottom.
- Over-working the dough during the stretching phase, causing it to shrink.
- Using low-protein flour, which prevents the crust from getting that airy chew.
Meal Prep & Storage
Make Ahead Tips
You can prepare the dough and let it cold retard in the refrigerator for 12–24 hours, which actually makes the flavor much richer.
Leftover Ideas
Store any leftover dough in a sealed plastic bag in the fridge for 24 hours, or freeze pre-portioned balls for up to 3 months; just thaw overnight before using.
Perfect Pairings
Serve this with...
Cooking Timeline
Mixing and kneading the dough.
Bulk fermentation at room temperature.
Dividing and proofing the dough balls.
Stretching and topping the pizzas.
Baking at high heat and resting.

The Best Crispy Sourdough Pizza Dough
There is something so comforting about a kitchen smelling of toasted grain and bubbling cheese. This crispy sourdough pizza dough creates a golden, airy base that just holds your favorite toppings perfectly.
Timing
Prep Time
30 Minutes
Cook Time
15 Minutes
Total Time
270 Minutes
Recipe Details
Ingredients
Dough Ingredients
-
01
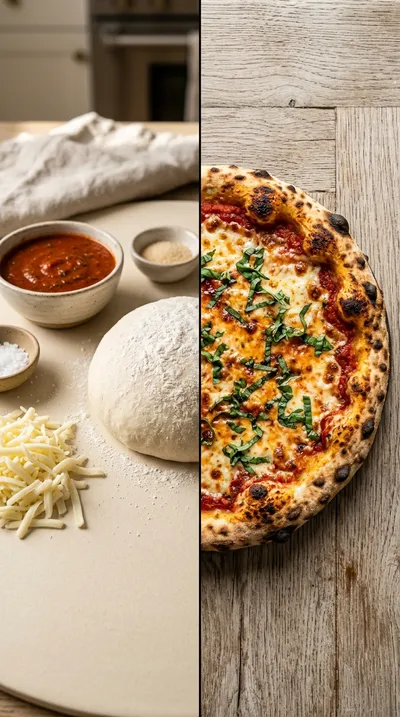
400g bread flour (¢3 cups)
-
02
240g water (¢1 cup + 4 tbsp)
-
03
80g active sourdough starter (100% hydration)
-
04
15g olive oil (¢1 tbsp)
-
05
10g salt (¢1 ½ tsp)
-
06
5g sugar (¢1 tsp)
-
07
12g active dry yeast (¢2 tsp) optional
Instructions
Start by whisking together your 400g bread flour, 10g salt, and 5g sugar in a large mixing bowl. I like to make sure everything is well combined so there are no little pockets of salt.
Now, if you're in a hurry and using yeast, go ahead and add the 12g active dry yeast to your dry mix. If you're sticking with the sourdough, just leave the yeast out.
Make a little well in the center of your flour mix—sort of like a volcano—and pour in 240g water, 80g sourdough starter (if that's what you're using), and 15g olive oil. Use a spatula or a wooden spoon to mix it until a shaggy dough forms. It'll look a bit messy at first, but that's okay.
Move the dough over to a lightly floured surface. Now comes the part I find so grounding: knead it for 5–7 minutes until it feels smooth and elastic. Honestly, if your arms get tired, you can just use a stand mixer with a dough hook on low speed for 5 minutes.
Shape your dough into a neat ball and cover it with plastic wrap or a damp towel. Let it bulk ferment at room temperature (20–22°C). If you're using sourdough, it'll need about 4–4.5 hours; if you're using yeast, 1 hour should do it. You're looking for it to be visibly expanded and slightly bubbly.
Once it's fermented, tip the dough onto a floured surface. Divide it into four equal portions (about 100g each) and shape each one into a tight, smooth ball.
Place your dough balls on a well–floured pizza peel or a baking sheet with parchment. Cover them loosely with parchment or a kitchen towel and let them proof for another 1–1.5 hours until they look a bit puffy.
Preheat your oven to 500°F (260°C) with your pizza stone or baking steel already inside. While that's getting hot, stretch each dough ball on a floured surface to about 10–12 cm in diameter. Make sure to leave a thicker rim for that lovely crust.
Add your favorite tomato sauce, shredded mozzarella, and whatever toppings you're craving. Slide the whole thing, parchment and all, onto the preheated stone. Bake for 10–12 minutes until the crust is golden brown and the cheese is bubbly and slightly browned. Wow, the smell is just wonderful.
Carefully remove the pizza with your peel. Let it rest on a cutting board for about 2 minutes—I know it's hard to wait—then slice it up and serve it while it's hot.
Notes & Tips
-
1
Using high-protein bread flour really helps with the chew.
-
2
Cold fermentation in the fridge can add a lot of depth to the flavor.
-
3
A little bit of steam in the oven helps the crust stay just right.

Tools You'll Need
-
Large mixing bowl for combined ingredients
-
Dough scraper to help handle the sticky bits
-
Measuring spoons for precision
-
Kitchen scale for exact weights
-
Plastic wrap or damp towel to keep the dough moist
-
Floured surface for kneading and stretching
-
Pizza peel for easy sliding
-
Pizza stone or baking steel for a professional heat
-
Oven for baking
-
Pizza cutter for clean slices
Must-Know Tips
-
Flour Choice, Use 100% gluten bread flour (12–13% protein) for maximum extensibility and a crisp crumb.
-
Cold Retardation, If using yeast, let the dough rest in the fridge for 12–24 hours after the first hour of rising for a deeper taste.
-
Steam Method, Keep a small bowl of water in the oven to help the crust stay crisp without drying out.
Professional Secrets
-
Utilize a baking steel or stone to mimic a professional pizza oven's heat transfer.
-
Allow the dough to rest for 2 minutes after baking to set the structure before slicing.
-
Maintain a room temperature of 20–22°C for consistent sourdough fermentation.
What readers are saying
Community reviews from home cooks like you
Good, but not amazing. The cups) flavor was nice, but my oven needed an extra 5 minutes. I might try it again with some adjustments.
I was surprised how good this turned out. I really liked how the 400g bread flour (¢3 cups) and 240g water (¢1 cup + 4 tbsp) came together. Will be making this regularly.
I wanted to love this dish, but it didn't quite work for me. I swapped one ingredient and it still worked. I think with some tweaks it could be really good.
I wanted to love this dish, but it didn't quite work for me. I found it a bit sweet for my taste. I think with some tweaks it could be really good.
Can't believe how simple this was. I really liked how the 400g bread flour (¢3 cups) and 240g water (¢1 cup + 4 tbsp) came together. Will be making this regularly.
This was a hit with my family. I really liked how the 400g bread flour (¢3 cups) and 240g water (¢1 cup + 4 tbsp) came together. It took slightly longer than the recipe said. Already shared it with a friend.
This was a hit with my family. I really liked how the 400g bread flour (¢3 cups) and 240g water (¢1 cup + 4 tbsp) came together. The texture was a touch off, but the flavor saved it. Already shared it with a friend.
So easy and delicious. I really liked how the 400g bread flour (¢3 cups) and 240g water (¢1 cup + 4 tbsp) came together. Highly recommend giving it a try.

Recipe by
Sofia RiveraExploring the world through food 🌍🍲 Rich flavors, exciting dishes, and endless culinary inspiration ✨
Get Delicious Recipes Weekly
Join 25,000+ home cooks getting our best recipes straight to their inbox.
Free forever • No spam • Unsubscribe anytime