
The art of sourdough is as old as agriculture itself, rooted in the ancient practice of capturing wild yeast from the air. While we often associate pizza with the fast-paced streets of Naples, the tradition of using a slow-fermented dough brings a depth of flavor and digestibility that modern quick-yeast recipes simply cannot match.
Creating bulk baked sourdough pizza crusts mirrors the way traditional village bakers once operated, preparing large batches of dough to sustain a community through the week. By utilizing a long fermentation period, the natural acids break down the gluten, resulting in that characteristic tang and a lighter texture.
This method of pre-baking and freezing is a modern evolution of those ancient rhythms. It allows the complex flavors developed by the sourdough discard to be preserved, ensuring that the convenience of a quick meal doesn't come at the cost of artisanal quality.
Why You'll Love It
-
- Honestly, there is nothing quite like the peace of mind that comes with having a stack of homemade crusts in the freezer for those chaotic weeknights.
-
- I mean, that sourdough tang just adds this lovely, deep soul to the bread that you simply can't get from a store-bought mix.
-
- Wow, the way these puff up in the oven is just magic, and they stay so wonderfully chewy even after they've been frozen.
-
- Well, look, it's just a gentle way to feed your family something real and hearty without spending hours in the kitchen every single night.
"Finally, a way to give my kids real sourdough pizza without spending my whole Tuesday in the kitchen. Just wonderful!"
Essential Ingredient Guide
- 4.5 kg all-purpose flour (about 38 cups): This is the heart of our bread. I find that all-purpose keeps things soft enough for the kids, though it needs a bit of patience during the folding process to get that structure just right.
- 2.25 kg sourdough discard (about 19 cups, 50% hydration): That tangy discard is where all the character lives. I remember when I first started, I'd just toss it, but using it here creates such a beautiful, reflective flavor.
- 6 tablespoons extra virgin olive oil (90 ml): A little bit of good oil keeps the crumb tender. It gives the crust a subtle, fruity richness that just feels like a warm hug.
- 4 tablespoons sea salt (45 g): Don't be shy with the salt; it wakes up all the other flavors. I like to stir it in early so it blends right into the dough.
- 9 cups water (2.1 L): Water is what brings everything to life. I usually use lukewarm water just to make sure the discard is happy and ready to work.
- sugar or honey: Now, this is optional, but a teaspoon of sugar or honey can make the rise a bit quicker. It adds a tiny hint of sweetness that balances the sourness, yeah.
Complete Cooking Process
-
Getting Ready:
Start by gently mixing your 2.25 kg sourdough discard (about 19 cups, 50% hydration) with water, salt, and oil. It's all about making sure those liquids are well incorporated before the flour joins the party.
-
Developing the Soul:
The real magic happens during those stretch and fold sessions and the overnight chill in the fridge. That's when the flavors deepen and the dough finds its strength, honestly.
-
Perfecting the Texture:
Dividing the dough into 12 equal portions and letting them rest for 20 minutes is key. It relaxes the gluten so you can shape them into smooth disks without the dough fighting you.
-
The Final Glow:
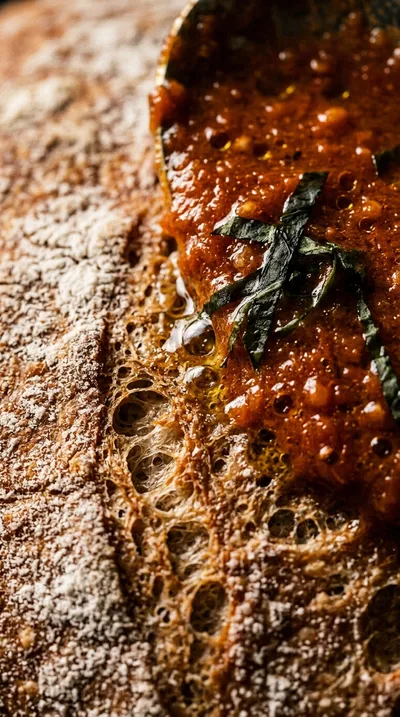
A quick 5-7 minutes at 250 °C (482 °F) gives them that lovely, puffy, golden look. I like to turn the rack down a bit to make sure the bottoms get a nice, even brown.
-
Storing for Later:
Once they've cooled, a quick flash-freeze on a tray keeps them from sticking together. Then you can just tuck them into bags and forget about them until dinner time.
-
Use parchment paper to prevent the dough from sticking and to make clean-up a breeze.
-
For an extra crisp edge, brush the crusts with a light slurry of olive oil before baking.
-
Add a teaspoon of sugar or honey to the discard batch for a slightly sweeter flavor and quicker rise.
-
To bake from frozen, just pop them on a hot stone at 250 °C for 5-7 minutes—no thawing needed.
Pro Tips
You've got this, just take your time and enjoy the process.


Better For You Treats
I love that we're using sourdough here, as it's much gentler on the tummy. For those looking for more fiber, you can swap some of the 4.5 kg all-purpose flour (about 38 cups) for whole-grain, which makes it feel even more grounded and hearty.
Ways to Make it Your Own
If you're feeling fancy, try a Parmesan Garlic Crust by folding in 1 tablespoon of grated parmesan and 1 teaspoon of dried garlic. Or, for something a bit more Mediterranean, stir in 2 teaspoons of dried oregano and 1 teaspoon of dried basil.
Serving Suggestions
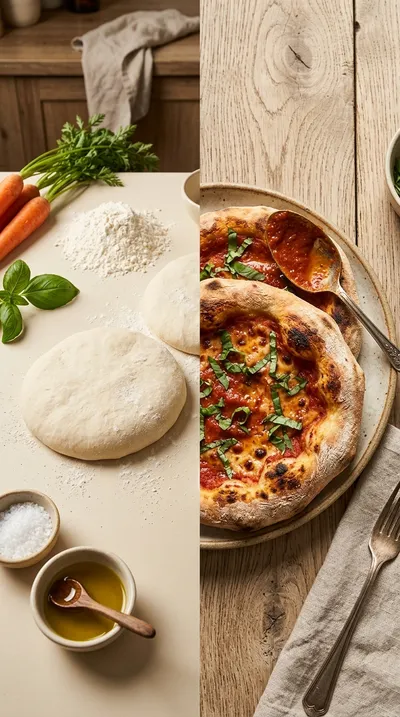
I usually top mine with classic marinara and fresh mozzarella for a cozy night in. But ugh, for breakfast? I love cracking a large egg on top with some cherry tomatoes for a quick little breakfast calzone.
Frequently Asked Questions
→ Can I skip the overnight fridge rest?
You could, but honestly, you'd miss out on that beautiful sourdough tang and the dough might be a bit harder to handle. It's worth the wait, really.
→ My dough is sticking to everything, what did I do wrong?
Oops, don't worry! Just use a bit more flour on your counter and definitely lean on that parchment paper—it's a lifesaver for sticky dough.
→ How do I know when the crusts are actually done during the first bake?
You're looking for them to be lightly golden and puffy. They don't need to be fully browned yet, since they'll get another trip to the oven once you add toppings.
Nutrition Facts
per serving
680
Calories
38g
Protein
115g
Carbs
8g
Fat
Taste Profile
A balanced, slightly tangy sourdough flavor with a clean, salty finish.
Ingredient Substitutions
Don't have an ingredient? Try these alternatives
Will result in a slightly chewier crust due to higher protein.
Adjust quantity slightly as kosher salt is less dense.
Recipe Variations
Try these delicious twists on the original
Parmesan Garlic Crust
For a savory, aromatic base, fold 1 tablespoon of grated parmesan and 1 teaspoon of dried garlic into each dough portion before you shape them into disks.
Herb-Infused Crust
Give your pizza a Mediterranean twist by stirring 2 teaspoons of dried oregano and 1 teaspoon of dried basil directly into the main dough mix.
Common Mistakes to Avoid
Learn from others' mistakes for perfect results
- Skipping the 1-hour room temperature rest after refrigeration, making the dough too stiff to shape.
- Over-flouring the counter, which can lead to a dry, tough crust.
- Bagging the crusts while still warm, which causes condensation and sogginess.
Meal Prep & Storage
Make Ahead Tips
These are designed for making ahead; bake and freeze them in bulk to store for up to 3 months.
Leftover Ideas
Frozen crusts are the leftover solution here; just bake from frozen at 250°C for 5-7 minutes.
Perfect Pairings
Serve this with...
Cooking Timeline
Mixing discard, water, salt, and oil.
Incorporating flour to form shaggy dough.
Autolyse rest period.
Periodic stretch and folds.
Cold fermentation in refrigerator.


Bulk Baked Sourdough Pizza Crusts
There is nothing quite like the scent of warm, toasted grain filling the kitchen. These bulk baked sourdough pizza crusts offer a chewy, tangy base that makes weeknight dinners feel like a slow Sunday afternoon.
Timing
Prep Time
60 Minutes
Cook Time
15 Minutes
Total Time
75 Minutes
Recipe Details
Ingredients
Dough Ingredients
-
01
4.5 kg all-purpose flour (about 38 cups)
-
02
2.25 kg sourdough discard (about 19 cups, 50% hydration)
-
03
9 cups water (2.1 L)
-
04
4 tablespoons sea salt (45 g)
-
05
6 tablespoons extra virgin olive oil (90 ml)
Instructions
Start by rinsing a large, sanitary container with clean water. Now, just gently rinse your 2.25 kg sourdough discard into it, adding the 9 cups water (2.1 L), 4 tablespoons sea salt (45 g), and 6 tablespoons extra virgin olive oil (90 ml). Give it a good stir until all that water is well incorporated.
Gradually add the 4.5 kg all-purpose flour (about 38 cups). I like to use my hands or a rubber scraper, stirring in a slow, steady motion. Keep going until a shaggy dough forms and the flour is fully hydrated, which usually takes about 3-4 minutes. It's a bit messy, but that's the best part.
Cover the dough loosely with a damp cloth or some plastic wrap. Now we just let it rest at room temperature (20-22°C) for 30 minutes. This is the autolyse phase, which honestly just lets the flour relax before we get to work.
Over the next 4.5–5 hours, we'll do 4-6 stretch and fold sessions. Every 90 minutes, just grab the edge of the dough, stretch it upward, fold it down, and turn the container 90°. It feels simple, but this is how we strengthen the gluten and build those lovely deep flavors.
After that final fold, cover the dough and tuck it into the refrigerator overnight (up to 24 hours). The cold slow-ferment is where the magic happens for the rise and the taste.
Take your dough out of the fridge and let it sit at room temperature for 1 hour; it makes it so much easier to handle. On a lightly floured counter, divide the dough evenly into 12 equal portions, which should be about 370g each.
Shape each portion into a smooth disk about 12 cm (4-inch) in diameter, leaving a small edge for the crust. Place each one on parchment paper or a floured pizza peel, cover loosely with plastic wrap, and let them rest for 20 minutes.
Preheat your oven to 250°C (482°F) with a pizza stone or baking sheet inside. Once it's hot, slide the crusts onto the stone. Bake for 5–7 minutes until they're lightly golden and puffy. Well, look—about 1/3 of the way through, turn the oven rack down a bit to make sure they brown evenly.
Transfer the cooled crusts onto a clean tray lined with parchment paper. Stack them carefully—don't squash them!—and put the tray in the freezer for 2–3 hours until they are fully solid.
Once frozen, move them into labeled airtight freezer bags. They'll keep for up to 3 months. When you're ready for dinner, just preheat to 250°C and bake the frozen crusts on the stone for 5°–7 minutes. No need to thaw them first!
Notes & Tips
-
1
Use parchment paper to prevent the dough from sticking and to make clean-up a breeze.
-
2
Let the dough sit for an hour after refrigeration to ensure it is pliable.
-
3
Rotating the oven rack helps avoid burnt bottoms while ensuring the top is puffy.
Tools You'll Need
-
Large mixing bowl for initial combining
-
Sanitary plastic or glass container for the long bulk ferment
-
Measuring cups and spoons for accuracy
-
Dough scraper and bench knife for dividing portions
-
Pizza stone or baking sheet for high-heat baking
-
Pizza peel or floured spatula for sliding dough
-
Baking oven
-
Paper towels or parchment paper for non-stick surfaces
-
Airtight freezer bags or freezer-safe containers
Must-Know Tips
-
Parchment Paper, use it to prevent sticking and make clean-up much easier.
-
Oven Rack Position, turn the rack 1/3 of the way down to promote even browning.
-
Cold Ferment, don't skip the overnight fridge rest as it's essential for the sourdough flavor.
Professional Secrets
-
Autolyse technique, letting the dough rest for 30 minutes before folding relaxes the flour.
-
Stretch and Folds, performing these every 90 minutes develops superior gluten structure compared to kneading.
-
Flash Freezing, freezing the crusts on a tray before bagging prevents them from sticking together.
What readers are saying
Community reviews from home cooks like you
It was okay, with a few tweaks. The cups) flavor was nice, but i added a bit more seasoning next time. I might try it again with some adjustments.
Can't believe how simple this was. I really liked how the 4.5 kg all-purpose flour (about 38 cups) and 2.25 kg sourdough discard (about 19 cups, 50% hydration) came together. Will be making this regularly.
Absolutely loved this recipe! I really liked how the 4.5 kg all-purpose flour (about 38 cups) and 2.25 kg sourdough discard (about 19 cups, 50% hydration) came together. Saving this for later.
This was a hit with my family. I really liked how the 4.5 kg all-purpose flour (about 38 cups) and 2.25 kg sourdough discard (about 19 cups, 50% hydration) came together. Thanks for sharing this one!
Will definitely make this again. I really liked how the 4.5 kg all-purpose flour (about 38 cups) and 2.25 kg sourdough discard (about 19 cups, 50% hydration) came together. Perfect as written.
Pretty good overall. The cups) flavor was nice, but i found it a bit sweet for my taste. I might try it again with some adjustments.
The flavors were spot on. I really liked how the 4.5 kg all-purpose flour (about 38 cups) and 2.25 kg sourdough discard (about 19 cups, 50% hydration) came together. My kids even asked for seconds.

Recipe by
Sofia RiveraExploring the world through food 🌍🍲 Rich flavors, exciting dishes, and endless culinary inspiration ✨
Get Delicious Recipes Weekly
Join 25,000+ home cooks getting our best recipes straight to their inbox.
Free forever • No spam • Unsubscribe anytime