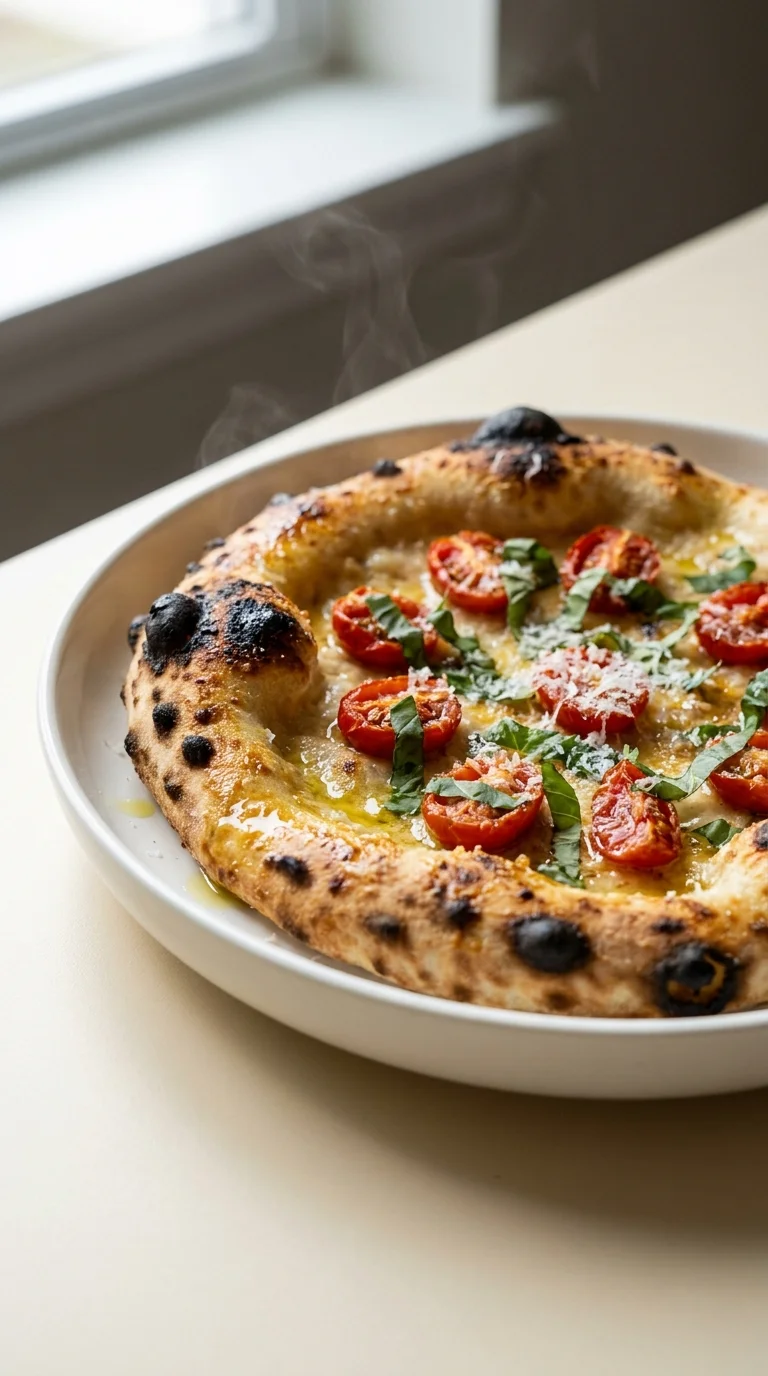
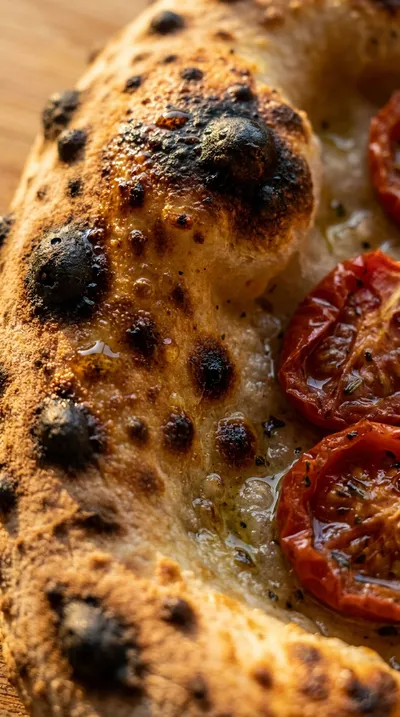
The art of the sourdough pizza crust is a nod to the ancient traditions of European baking, where wild yeast was the only way to bring bread to life. While modern pizza is often associated with the fast-paced streets of Naples, the use of a natural starter adds a layer of complexity and digestibility that dates back centuries. This method allows the enzymes to break down the gluten more thoroughly, resulting in that signature tang and a lighter crumb.
In Italy, the balance of flavors is paramount—the acidity of the fermented dough perfectly complements the natural sweetness of cherry tomatoes, halved. This harmony is further elevated by the addition of fresh basil leaves, a staple of the Mediterranean diet that provides a fragrant, aromatic finish.
Over time, this style of pizza has evolved from a rustic village staple into a celebrated craft. The slow fermentation process isn't just about flavor; it's a reflection of a culture that values patience and the natural rhythm of the seasons. It transforms a simple combination of flour, water, and salt into something deeply nourishing and timeless.
Why You'll Love It
-
- Honestly, there is just something about that sourdough tang that makes a pizza feel like a real meal. It has this wonderful, chewy heart that reminds me of the old bakeries I used to visit.
-
- Those 200 g cherry tomatoes, halved, just burst in your mouth with a sweetness that balances the salty crust perfectly. Wow, it's like a little piece of summer on a plate.
-
- I love how simple this is once you get the hang of it, yeah, it's just flour, water, and a bit of patience. It's the kind of slow cooking that actually lets you breathe and relax.
-
- The smell of 30 g fresh basil leaves hitting that hot crust... well, look, it's enough to make the whole house feel warm and welcoming.
"I mean, I've tried a lot of crusts, but this one is just different. That tang is incredible!"
Essential Ingredient Guide
- 500 g bread flour (≈4 cups): I always use bread flour here because it gives the crust that sturdy, professional lift. It's what makes the edges so satisfyingly crisp while keeping the middle soft.
- 100 g active, bubbly sourdough starter (100% hydration): This is the soul of the pizza, really. Make sure it's nice and bubbly before you start, or the dough just won't have that lovely, characteristic lift.
- 50 g grated Parmesan cheese (optional): Now, this one is optional, but I usually add it for a little nutty depth. It adds a salty punch that just makes the cherry tomatoes sing.
- ½ tsp dried oregano (optional): Just a pinch of this adds that classic pizzeria aroma. I like to scatter it over the tomatoes so it toasts slightly in the oven.
- 2 tbsp extra‑virgin olive oil: I use a good quality oil here to drizzle over the crust. It carries the flavor of the basil and helps those tomatoes roast beautifully.
- 10 g salt (≈1 ½ tsp): Don't be tempted to skip this, honestly. Salt is what wakes up the flour and makes the sourdough flavor really pop.
Complete Cooking Process
-
Getting Ready:
I like to measure everything on my scale first—it just keeps things calm. Making sure the 300 g water, 75°F (≈2 ½ cups) is just right helps the starter wake up gently.
-
Developing Flavor:
The real magic happens during that long proof. If you have the time, letting the dough sit in the refrigerator for 12–15 hours gives it a deeper, more complex tang that is just wonderful.
-
Perfecting Texture:
Kneading for 8–10 minutes is where the structure happens. You'll feel it change from a sticky mess to something smooth and elastic under your palms.
-
The Final Touch:
Right before it leaves the oven, I sprinkle the remaining basil leaves on top. It keeps them bright green and fragrant, rather than letting them wilt too much.
-
Serving the Slice:
I always let it rest for about 2 minutes. It's hard to wait, I know, but it lets the crust set so you get that perfect, clean slice.
-
For an extra crisp edge, bake on the lower rack for 6 minutes, then move it to the top.
-
Use a dough scraper to shape the dough; it keeps things clean and prevents sticking.
-
If the dough feels too wet, just add a tablespoon of flour at a time—sourdough can be a bit moody.
-
Preheat your pizza stone at 260°C (500°F) for at least 45 minutes for that professional sear.
Pro Tips
Just trust your hands and the dough will tell you when it's ready.


Better For You Treats
I appreciate that this uses a sourdough starter, which is much gentler on the tummy than commercial yeast. With a good balance of carbs and healthy fats from the 2 tbsp extra‑virgin olive oil, it feels like a mindful way to enjoy a treat.
Ways to Make it Your Own
You could try a Sourdough Parmesan Swirl by swirling some cheese into the surface, or maybe a Garlic‑Rosemary Dough by adding a crushed clove and a teaspoon of rosemary during the first knead. Honestly, the sourdough base is so versatile, it just takes whatever you love.
Serving Suggestions
I love pairing this with a simple arugula salad and a lemon vinaigrette to cut through the richness. If you're feeling fancy, a little drizzle of balsamic glaze over the top adds a lovely sweetness that the family always loves.
Frequently Asked Questions
→ What if my dough is too sticky to knead?
Oops, that happens to the best of us! Just sprinkle a little extra flour on your hands and the surface, but do it slowly so you don't lose that lovely chewiness.
→ Can I make the dough ahead of time?
Oh, absolutely. In fact, I prefer putting the dough balls in the fridge for 12–15 hours; it really lets the flavors deepen and makes the crust taste more authentic.
→ Do I really need a pizza stone?
It helps a lot for that crispy bottom, yeah, but if you don't have one, a preheated baking sheet turned upside down works in a pinch.
Nutrition Facts
per serving
620
Calories
21g
Protein
72g
Carbs
18g
Fat
Taste Profile
A beautiful balance of tangy sourdough, sweet roasted tomatoes, and savory Parmesan.
Ingredient Substitutions
Don't have an ingredient? Try these alternatives
The crust will be slightly softer and less chewy.
This will add a saltier, sharper punch to the topping.
Recipe Variations
Try these delicious twists on the original
Sourdough Parmesan Swirl
Before you pop it in the oven, swirl some grated Parmesan right into the dough surface for a rich, nutty flavor that just melts into the crust.
Garlic-Rosemary Dough
If you want something more aromatic, add one crushed garlic clove and a teaspoon of fresh rosemary during the first knead.
Common Mistakes to Avoid
Learn from others' mistakes for perfect results
- Rushing the proofing process, which leads to a denser crust.
- Over-flouring the surface, which can make the crust taste dry.
- Putting toppings on a cold stone, resulting in a soggy bottom.
Meal Prep & Storage
Make Ahead Tips
The dough is wonderful when made ahead; let it prove in the refrigerator for 12-15 hours for a deeper flavor.
Leftover Ideas
Store leftovers in the fridge and reheat in a dry pan or oven to bring back the crispiness.
Perfect Pairings
Serve this with...
Cooking Timeline
Measuring and mixing the shaggy dough
Kneading the dough until elastic
Bulk fermentation at room temperature
Dividing and second proofing of dough balls
Shaping, topping, and baking the pizza

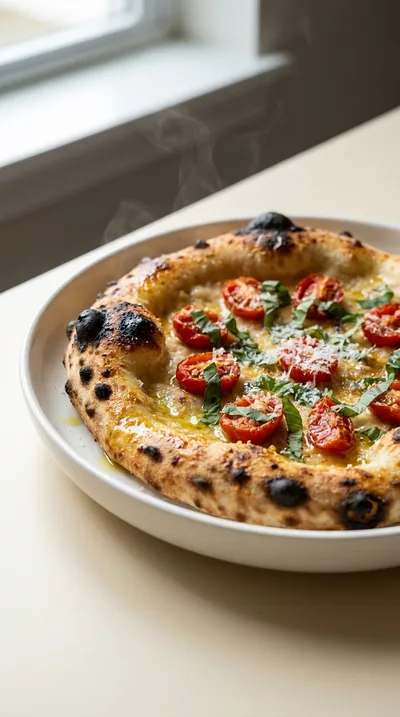
Sourdough Pizza Crust with Basil & Cherry Tomatoes
There is something so comforting about a sourdough pizza crust that bubbles up in the oven, smelling of toasted grain and warmth. Topped with burst cherry tomatoes, halved, and fresh basil leaves, it is a simple, earthy meal that feels like a hug.
Timing
Prep Time
15 Minutes
Cook Time
12 Minutes
Total Time
27 Minutes
Recipe Details
Ingredients
Dough
-
01
500 g bread flour (≈4 cups)
-
02
300 g water, 75°F (≈2 ½ cups)
-
03
100 g active, bubbly sourdough starter (100% hydration)
-
04
10 g salt (≈1 ½ tsp)
Toppings
-
01
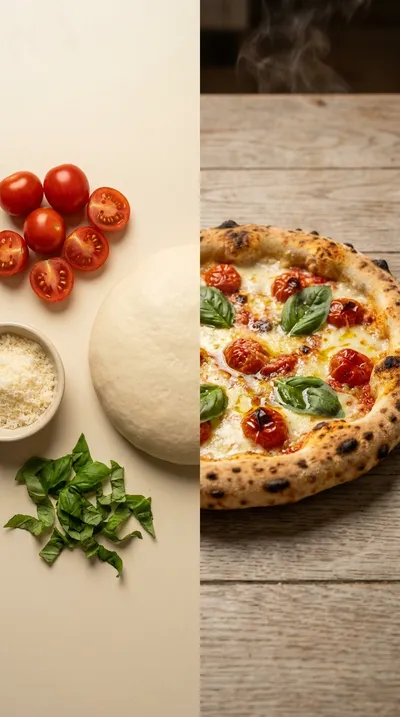
200 g cherry tomatoes, halved (≈2 cups)
-
02
30 g fresh basil leaves, plus 1 tsp for garnish
-
03
2 tbsp extra‑virgin olive oil
-
04
1 tsp olive oil for brushing dough
-
05
50 g grated Parmesan cheese (optional)
-
06
½ tsp dried oregano (optional)
Instructions
Go ahead and measure all your ingredients on the scale first; it just makes things so much smoother. In your mixing bowl, gently combine the 500 g bread flour, 100 g active, bubbly sourdough starter (100% hydration), and 10 g salt.
Slowly add the 300 g water, 75°F (≈2 ½ cups), and stir with a dough scraper. You're looking for a shaggy dough to form—it's a bit messy at this stage, but that's just how it goes.
Move the dough onto a surface with a little flour. Now, just knead it by hand for about 8–10 minutes. I find this part quite meditative; just keep going until the dough feels smooth and elastic under your palms.
Shape it into a nice ball and nestle it into a lightly oiled bowl. Cover it with plastic wrap and let it bulk ferment at room temperature (75°F/24°C) for 3–4 hours. It needs its time to wake up, you know.
Divide the dough into two equal portions (≈250 g each) and shape them into balls. Place them on parchment paper, cover, and let them prove. You can do this for 2–3 hours at room temperature, or if you have the patience, leave them in the refrigerator for 12–15 hours for a deeper, more complex flavor.
About 45 minutes before you want to eat, preheat the oven to 260°C (500°F) with the pizza stone on the middle rack. Brush each dough ball with 1 tsp olive oil and let them rest on the parchment.
On a floured surface, use a rolling pin or just your hands to press each ball into a 10‑inch circle. Drizzle 2 tbsp extra‑virgin olive oil over the top, then scatter your 200 g cherry tomatoes, halved, toss on the ½ tsp dried oregano (optional), and lightly scatter the 30 g fresh basil leaves.
Slide the pizza onto a flour-dusted pizza peel, then carefully transfer it onto that hot pizza stone. Bake for 10–12 minutes until the crust is golden and crisp on the edges but still soft inside.
Use the peel to remove the pizza and let it rest for 2 minutes—it's hard to wait, I know. Then, sprinkle on the remaining basil leaves and the 50 g grated Parmesan cheese (optional) if you're feeling fancy.
Slice it up with a pizza cutter and serve it hot. Honestly, there's nothing like that tangy sourdough crust with fresh tomatoes.
Notes & Tips
-
1
Sourdough hydration can vary quite a bit, so don't be afraid to adjust the flour slightly.
-
2
A cold ferment in the fridge really brings out that signature sourdough tang.
-
3
Using a pizza stone is key for getting that professional, crispy bottom.
 Snacks, Appetizers & Fun Bites
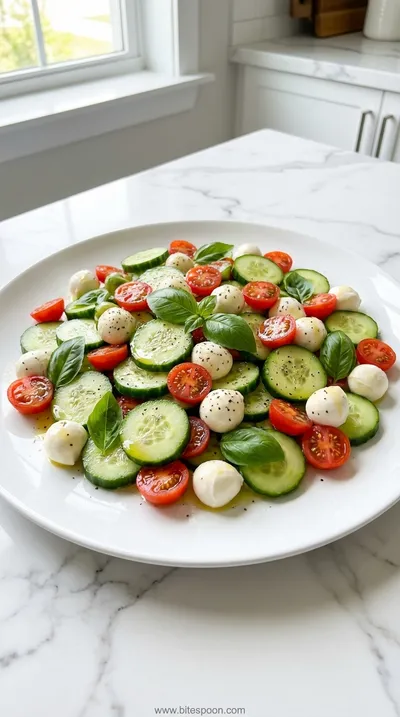
Quick Cucumber Mozzarella Salad
A quick, crisp cucumber and mozzarella salad with a hint of sweet vinaigrette.
Tools You'll Need
-
Large mixing bowl for combining ingredients
-
Dough scraper for mixing and shaping
-
Kitchen scale for precise measurements
-
Plastic wrap or damp towel for covering dough
-
Pizza stone for high-heat baking
-
Parchment paper for easy handling
-
Pizza peel for sliding the dough
-
Oven for baking
Must-Know Tips
-
Hydration Adjustment, if the dough feels too wet, add a tablespoon of flour at a time.
-
Crisp Edge Trick, bake on the lower rack for 6 minutes then move to the top.
-
Scraper Use, use a dough scraper to prevent sticking and get clean edges.
Professional Secrets
-
The secret to the depth of flavor is the 12-15 hour refrigerator proof.
-
Brushing the dough with olive oil before shaping helps the crust brown beautifully.
-
Allowing the pizza to rest for 2 minutes before topping with fresh cheese and basil prevents the herbs from wilting too quickly.
What readers are saying
Community reviews from home cooks like you
Can't believe how simple this was. I really liked how the 500 g bread flour (≈4 cups) and 300 g water, 75°F (≈2 ½ cups) came together. Will be making this regularly.
Will definitely make this again. I really liked how the 500 g bread flour (≈4 cups) and 300 g water, 75°F (≈2 ½ cups) came together. It took slightly longer than the recipe said. Saving this for later.
Will definitely make this again. I really liked how the 500 g bread flour (≈4 cups) and 300 g water, 75°F (≈2 ½ cups) came together. Will be making this regularly.
This was a hit with my family. I really liked how the 500 g bread flour (≈4 cups) and 300 g water, 75°F (≈2 ½ cups) came together. Will be making this regularly.
The flavors were spot on. I really liked how the 500 g bread flour (≈4 cups) and 300 g water, 75°F (≈2 ½ cups) came together. Already shared it with a friend.
I was surprised how good this turned out. I really liked how the 500 g bread flour (≈4 cups) and 300 g water, 75°F (≈2 ½ cups) came together. Highly recommend giving it a try.
This exceeded my expectations. I really liked how the 500 g bread flour (≈4 cups) and 300 g water, 75°F (≈2 ½ cups) came together. Already shared it with a friend.
Will definitely make this again. I really liked how the 500 g bread flour (≈4 cups) and 300 g water, 75°F (≈2 ½ cups) came together. It took slightly longer than the recipe said. Highly recommend giving it a try.
The flavors were spot on. I really liked how the 500 g bread flour (≈4 cups) and 300 g water, 75°F (≈2 ½ cups) came together. I added a bit more seasoning next time. Great addition to my recipe rotation.
I wanted to love this dish, but it didn't quite work for me. I found it a bit sweet for my taste. I think with some tweaks it could be really good.
It was okay, with a few tweaks. The cups) flavor was nice, but next time i'll double the sauce. I might try it again with some adjustments.

Recipe by
Sofia RiveraExploring the world through food 🌍🍲 Rich flavors, exciting dishes, and endless culinary inspiration ✨
Get Delicious Recipes Weekly
Join 25,000+ home cooks getting our best recipes straight to their inbox.
Free forever • No spam • Unsubscribe anytime